migrate to vcsa 6.5 U3 GUI xlarge issue

For a customer I’m migrating their legacy vSphere 5.5 environment to vSphere 6.5 U3.
The migration is from a windows vCenter to the VCSA.
First, we tried to use the GUI and stumbled over an issue.

GUI

The GUI, is of course a nice, friendly way to do this process. But when we got at the stage to select the size of the VCSA, we only had the ‘xlarge’ option.
And well… that was a bit too much. Because we were aiming at the ‘small’ size.

So we did some searching on the internet and found out that we were not alone. Although it was an encouraging thought, we still didn’t find what we were looking for.
Most of the threads and blog posts pointed to database size, log size etc..
And yes, they need to be checked. We had a vcenter database table of 7 million records, the size of the database was 80 GB. After some cleaning up and shrinking the database it was only a few GB.
But al this effort, didn’t persuade the GUI to give us the desired ‘small’ size option.

CLI

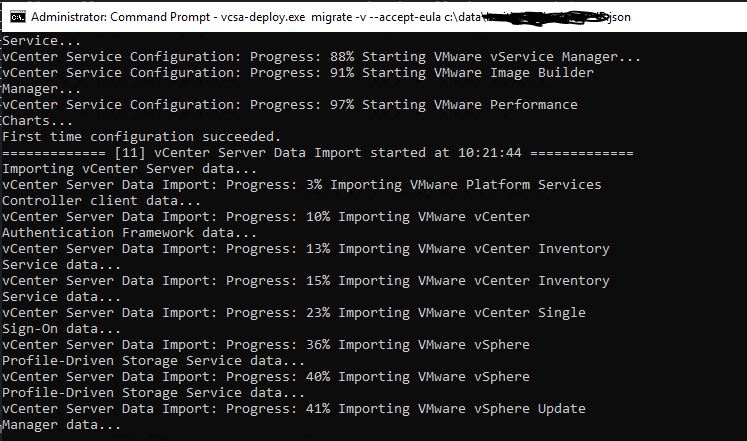
Hoping that the validation in the GUI was different than when using the CLI, we decided to migrate using the vcsa-deploy CLI method.

Yes, it involves creating a json file. But the .iso file for the vcsa contains several template files, for several migration scenarios.
We used on of the templates, customized it to our needs (setting the size to ‘small’. And after some trial and error we finally got it working.

TIP: validate your json file with

vcsa-deploy --precheck-only \some_path_to_json_file\migrate.json

If you want to read more about the CLI way of migration, check the vmware docs here.

vcsa-deploy creates for every run a new log folder . When we checked the logs we found out that vcsa-deploy was content with the ‘small’ size option we configured in the json file.

Thoughts

Why not 6.7 U3, well due to dependencies 6.5 U3 is at the moment the most current version we can run.
Although this post is about migrating to 6.5 U3, it could also work for 6.7 U3, but no guarantees.
The gist of this all is, if the GUI doesn’t work, try doing it the CLI way.

Set Email notificions on vCenter Alarm definitions

One of the task when configuring a vCenter is to setup the alarm notifications. But to configure 268 alarms by hand…. well it is just a scary task when you do it via the gui / webclient.
In short I created this script that you can find on my github.

The full story

Continue reading “Set Email notificions on vCenter Alarm definitions”

VMware Enhanced Authentication Plugin Not Working

For several versions of vSphere vCenter it is possible to logon with your windows credentials. Making it easier to only tick a box and logon instead of typing your username and password.
This nice and neat trick is done via the VMware Enhanced Authentication Plugin.
The only issue… it does need to work every time, else it is going to be an annoyance.
And , yes, it became an annoyance for me… especially when using Firefox.
So let me give you to possible solutions

Continue reading “VMware Enhanced Authentication Plugin Not Working”

VCSA 6.5 with subCA Gotcha’s

One of my projects recently was migrating from a vSphere 5.5 enviroment, running on Widows OS, to vSphere 6.5 running on VCSA.
VMware did a good job with the tools for migrating to VCSA 6.5.

In vSphere 5.5 it was a challenge to replace the self-signed certificates, especially if they where expired…. From 6.0 on VMware introduced certificate managed for the vSphere enviroment. And where the PSC would be the CA for the vSphere enviroment.
With this, you can choose to let vCenter be a subCA in your PKI infrastructure.

You can find enough how-to’s for configuring the VCSA as a subCA. Like  here:

I just want to add some Gotcha’s, maybe you think ‘Yeah, of course…. duh….. why don’t you know that…’ well… then that Gotcha’s wasn’t meant for you 🙂

Gotcha’s

  1. file access to VCSA
  2. certificate names
  3. issuing the subCA certificate on a windows offline root CA

Gotcha 1  – File access to VCSA

At some point you need to download the CSR (certificate request) and copy it in your PKI enviroment. The most common method is to use SCP for file access… but the shell of the VCSA doesn’t support this by default.
This is what you need to do:

  1. allow SSH and bash access to VCSA
  2. Login as root into the VCSA with a ssh-client
  3. access the shell
    >shell
  4. change the shell for root to bash shell
    >chsh -s “/bin/bash” root
  5. Run winscp (or any other SCP client) and connect to the VCSA

To change the shell setting back to its original configuration, run
>chsh -s “/bin/appliancesh” root

Gotcha 2 – certificate names

This was a, a-yes-off-course moment…. but it did cost me some headache….

When running the steps to configure the VCSA as a subCA in your PKI, you get a few times the question

Enter proper value for ‘Name’ [Default value : CA] : ……

Make sure you use unique names here. This is the name of a certificate that is going to be generated for you. The certificate manager doesn’t check these settings, and in the end it will make a rollback…. a.k.a. waste of time.

My suggestion is for a naming convention: <hostname>-<file name being configured>
For instance, when your VCSA hostname is: VCSA-01 and your busy with the questions for the vpxd.cfg file, then the value you would enter would be ‘VCSA-01-vpxd’
But you are (off course) free to choose your own. Just make sure that these values are unique.

The certificate manager is asking values for the following files:

  • MACHINE_SSL_CERT.cfg
  • machines.cfg
  • vsphere-webclient.cfg
  • vpxd.cfg
  • vpxd-extensions.cfg
  • certool.cfg (used to creating the subCA CSR)

Gotcha 3 – issuing the subCA on a windows offline root CA

As a good practise, the CA is installed on a windows server that is not part of the AD domain and normally is powered off.

When requestion a certificate you normaly would use a browser and go to the url <hostname subca>/certsrv. But if this isn’t available on a offline root, you can use the cmd-line.

The cmd is:
> certreq -submit -attrib CertificateTemplate:<name of CA template> <filepath of CSR>

Steps to issue a the subCA certificate

  1. create the CSR with the certificate-manager in the VCSA
  2. copy the CSR to the offline root server (see gotcha 1 for scp file access)
  3. request the certificate with the cmd-line command
  4. open the certificate authority
  5. find the requested certificate under ‘pending requests’
  6. issue the certificate
  7. export the certificate to a file (export Binary data -> Binary Certificate )
  8. import the new certificate under local machine in the personal location
  9. export the imported certificate as a base64 certificate
  10. export the rootCA certificate as a base64 certificate
  11. create a chain file by adding first the subCA file content and then the rootCA file content into the chain file
  12. copy the chain file to the VCSA
  13. (shutdown  the offline root server)
%d bloggers like this: