vExpert NUC 2022

As mentioned in my previous blog I received (as many other vExperts) a ‘NUC’ (sponsered by Cohesity) to be used for a home lab. We were asked to blog about how we are going to use it in our homelab. So this is part 1 of …. (I have no clue ) blogging about my adventures with this NUC

What are you ?

To drop the b… it is not a nuc.
a nuc is a small form factor PC manufactured by Intel. This devices is manufactured by Maxtang. It is a small form factor PC, a NUC look-a-like.
And it has its own page at their site, titled ‘Intel Elkhart Lake J6412 Processor based compact fanless mini pc’.

The specs

CPU: Intel Elkhart Lake Celeron J6412 (4 cores)
Memory: SO-DIMM DDR4 max 32 GB
Ethernet: 2x nic – Realtek RTL8111H – 10/100/1000 Mbps
Storage: 1x M.2 for 2242/2280 SSD (SATA)
I/O: 2x USB 2.0, 2x USB 3.2, 1x USB-C
Display: 2x HDMI 2.0

Full specs can be found here
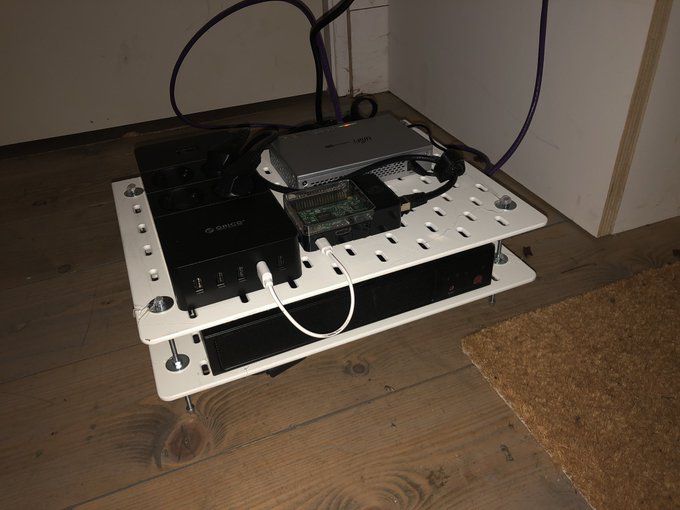
Usage

My ‘nuc’ is going to be used for a pfsense router. At the moment I use pfSense in a VM for my firewaling and routing at home. A VM is great, but in my homelab server (a supermicro) memory is scares. And having the router virtualised, demands to much memory. At first my pfSense VM was only used for my homelab, but it became more and more my main firewall and router for my home network. Which introduced some challenges. Namely losing internet when updating ESXi.
So moving it a dedicated hardware, results in no internet loss in my home for my family when I update my homelab.

Challenges

Installing pfSense, easy. And it looked like it was running fine. But once in a while, my WIFI was gone. And my LAN networks weren’t available.
Scrolling through the logs I first found the UUID error.
Also googling for the realtek NICs and pfsense, I found out that the realtek drivers aren’t updated in the freeBSD image.

UUID error

For the UUID error I had to search in the source code of pfSense (which is available in github) for the error message. And looked on the community forum of pfsense (here) And I found out that pfSense checks the UUID against a blacklist of UUIDs. And guess what….
My UUID was blacklisted….
The solution was to change the UUID. For this I needed to boot into the EFI shell and run DMI edit for AMI. After a long search I found the needed software here.
I downloaded dmi-edit-efi-ami.zip, unpacked it to a USB flash drive, read the documentation and changed some DMI settings.
And this solved my issue. But it didn’t solve the network issue.

Realtek NIC

I knew already that the realtek nics aren’t supported for ESXi. But I hoped pfSense (or freeBSD for that matter) would.
But no. pfSense would work for a week. Ben then my network dropped. Especially my VLANs.
After some search I found that you could update the Realtek drivers for freeBSD. (here)

To install them I followed the following steps on the shell of pfSense.

adding the package

pkg add https://pkg.freebsd.org/FreeBSD:12:amd64/latest/All/realtek-re-kmod-197.00.pkg

Letting pfSense know it should load the realtek drivers on boot by creating/ editing the file loader.conf.local in /boot/

if_re_load="YES"
if_re_name="/boot/modules/if_re.ko"

Then a cold reboot of pfSense and checking the OS boot log that the re1/re0 interfaces show the correct version (version 1.97.00)

This solved the issue. I haven’t seen the issue since.
So now I have my firewall/router running on dedicated hardware, making it independent from my ESXi homelab server. And leaving me with more available resource in my homelab to experiment with BOSH and CloudFoundry.

invoke-command instead of invoke-expression

In my previous post (which you can find here ) I use the invoke-expression cmdlet for running a Powershell script which was downloaded with invoke-webrequest.
And this was a good solution. The code that was downloaded and executed was a powershell script that would run a private function. This private function then was formated with the three scriptblocks Begin,End and Process.
Parameters where with a same construct being downloaded from a git repository and placed in a powershell Object called $P.
With this approach I separated code parameters from the actual code.
Using GIT I was able to versioning my parameters file, separate from my script code. This setup is working great. And it gives flexibility by leaving the code untouched when changing parameters.

But…

Yeah, a but…. I still needed a way to pass parameters /arguments on the command line. Using invoke-expression… well that wasn’t possible.
So I looked into invoke-command, which has an -argumentlist parameter., making it possible to pass one or more arguments to the script. Using named parameters isn’t possible, which is not what I was looking for.
So to support naming parameters, I decided to introduce just one parameter. And this parameter should be a JSON string, making it possible to pass multiple parameters merged into a JSON object.

The only challenge with this is that all the interpreters that the code was going to pass, should leave the JSON string intact, including the quotes. And I didn’t want to escape any quotes. That would be messy and prone to errors. But encoding it, should solve this issue. The argument is a base64 encoded JSON string.

Is it secure?

Well, No …. not at all… it is a base64 encoding. My goal was not to make it more secure, but that the string wouldn’t be changed by the different shell interpreters.
Off course, you can make it more secure by using private/public key-pairs. You could use a docker volume containing the encoding keys, or other secure methods. When using base64 coding, just don’t pass any sensitive data (passwords) with it. There are other, more secure, approaches for this with containers.

parameter approaches

This setup gives me different approaches to pass parameters to the script. The more static parameters are stored in a .json file, stored in a GIT repository.
And the more dynamic parameters (like VM names to start), are passed via the base64 encoded JSON string.

What changed ?

I changed to following items:

  • changed entrypoint string
    • using invoke-command instead of invoke-expression
    • placing invoke-webrequest inside a scriptblock
    • using argumentlist to pass a base64 string, encoded a JSON string
  • changed powershell wrapper script to decode inpu

Docker Entrypoint

The previous docker entrypoint was something like

pwsh -Command invoke-expression '$(Invoke-WebRequest -SkipCertificateCheck -uri ' + <git URI> + ' -Headers @{"Cache-Control"="no-store"} )'

The new entrypoint is looking like

pwsh -Command invoke-command -scriptblock ([scriptblock]::Create( (Invoke-WebRequest -SkipCertificateCheck -uri <git URI> -Headers @{"Cache-Control"="no-store"} ).content ) ) -ArgumentList <base64 coded JSON string>

As you can see, the one-liner has grown.
I used the -scriptblock and the -ArgumentList parameter from the invoke-command. The -scriptblock contains the Invoke-webrequest cmdlet which downloads the RAW version of the powershell script on the GIT repository.
The invoke-command cmdlet then executes this scriptblock and passing the argument from the argumentlist to this script.

Script Layer

The script has a wrapper layer, a main layer (containing the Begin,End and Process blocks) and the Process block containing the specific code to run.

<#
.SYNOPSIS
    template.ps1 powershell
.PARAMETER inputObject 
    A JSON string base64 (UTF-8) encoded
#>

param(
    [string][Parameter(
        ValueFromPipeline = $true, 
        ValueFromPipelineByPropertyName = $true,
        HelpMessage="JSON string base64 (UTF-8) encoded.")]$inputObject=""
)

function main {

}
#-- calling the real powershell code to run
main

main layer (function)

I choose to use the function method to preserve my code format structure. For most of my powershell code I use the End,Begin and Process scriptblocks to structure the code. And I didn’t want to stepp down from that approach.

function main {
    <#
    .SYNOPSIS

    #>
    Begin{
        $uri = <url to RAW version of parameter file>
        #-- trying to load parameters into $P object, preferably json style
        try { $webResult= Invoke-WebRequest -SkipCertificateCheck  -Uri ($scriptrootURI+$scriptName+".json") -Headers @{"Cache-Control"="no-store"}  }
        catch  {
            write-host "uri : " + $scriptrootURI
            throw "Request failed for loading parameters.json with uri: " + $webResult 
        }
        # validate answer
        if ($webResult.StatusCode -match "^2\d{2}" ) {
            # statuscode is 2.. so convert content into object $P
            $P = $webResult.content | ConvertFrom-Json 
        } else {
            throw ("Failed to load parameter.json from repository. Got statuscode "+ $webRequest.statusCode)
        }

    #-- private functions
        function exit-script {
            ...
        }

    #--- proces inputObject (the argument passed via the cmd line
        # decode that inputObject as UTF-8 base64 and convert it to a powershell object
        $A= ConvertFrom-Json -InputObject ([System.Text.Encoding]::UTF8.GetString([System.Convert]::FromBase64String($($inputObject)))) -ErrorAction SilentlyContinue -ErrorVariable err1
        if ($err1) {
            writ-host "Failed to proces input object"
            exit-script
        }
    }
    End {
        exit-script -exitcode 0
    }
    Process {
        #-- the code that is doing the real work
        write-host ($P.world) #-- from the parameter.json file
        write-host ($A.universe) #-- passed via the cmd line argument
    }
}

Final

So I hope this blog gives you some ideas with you code challenges.
I’m going to write a more structured set of articles , a deep dive into my FaaS – like setup. So keep following this blog, when interested.
And comments, are always welcome.

Ansible in a (docker) container

Ansible Playbooks vs Roles: Part I - The Playbook ...

A year ago, after following a few sessions at the dutch VMATechcon I decided to dive into the world of Ansible. With a background in industrial automation (programming PLCs) I have a soft spot for writing code. I saw the benefits of declarative languages, and decided to dive into Ansible.
But where to start. And what should I use it for.

Image

I’m working on a small VM which provides DHCP,DNS,TFTP,FTP,HTTP and NTP services so I can easily (PXE) boot nested ESXi hosts on VMware workstation and my homelab. All running in docker containers on Photon OS.
For maintenance (and learning) I decided to use Ansible for building, running these containers.

One of the issues I had, was that I had to maintain the VM and the software installed on it… I’m quite proficient with Linux, but it can still be a challenge.
And keeping installations logs update about how to install software… yeah…. that is an issue. A embraced the solutions docker, git and ansible are giving me. (And vagrant, when using VMware workstation).

Using docker to run the services, using ansible to automate workflows and using git to keep track of changes and store my code in my github repositories.
With this approach I can easily rebuild the VM when it breaks down. And I see the VM more as a processing entity, then a virtual computer that needs to be maintained.

The Ansible container

browsing the internet I found this blog post about running ansible inside a docker container and using it interactively on the docker host. This gave me the possibility to have ‘portable’ ansible installation, without any ties to the VM OS.
In my opinion it is great. With adding some small bash scripts so I don’t need to write something like ‘docker run -rm -it …..’ everytime, I have an ideal solution.
The original code for the container is based on alpine:3.7 and python 2. Everytime I build the docker image I received a warning that python 2 is outdated…. so I (finaly) updated the dockerfile using alpine:3.11 as the base image and using python 3.
You can find my code here on github, and the docker image here on dockerhub.

How to use

simple. There are 2 ways to use it.

  1. clone git repository
  2. pull image from dockerhub

Option 1, clone git repository

I’ve created a small installation script to make things easier. It will run docker build to build the ansible image and it will copy the scripts under ./scripts/ to /usr/local/bin/
And your all set… well almost

Option 2, pull image from dockerhub

Instead of building the image, you can pull it from dockerhub into your local docker environment. The scripts assume that the docker image is tagged like ansible:2.9.0, but when you pull it from dockerhub, the name is brtlvrs/ansible-helper:v.0.3. So you need to retag them (or edit the scripts).

docker image tag brtlvrs/ansible-helper:v.0.3 ansible:2.9.0
docker image tag ansible:2.9.0 ansible:latest

The wrapper scripts are stored in the image, in the folder /2installOnHost
To copy them out of the image do the following

docker create -n test ansible:2.9.0
docker cp test:/2InstallOnHost/ah* /usr/local/bin/
chmod +x /usr/local/bin/ah*
docker rm test

This will create a docker container named test, using the imported image ansible:2.9.0.
Then copies the files from inside the container to the /usr/local/bin/ and sets the executable bit on these files.
Finally it removes the created docker container.
Now you should be able to run ah or ah-playbook.

Both scripts will mount the folowing volumes into the container

localmountpointremark
~/.ssh/id_rsa/root/.ssh/id_rsaneeded to access localhost via ssh (ansible)
~/.ssh/id_rsa.pub/root/.ssh/id_rsa.pubneeded to access localhost via ssh (ansible)
$(pwd)/ansible/playbooksMountpoint is the default location inside the container.
/var/log/ansible/ansible.logMaking the ansible logs persistent.

Finishing touch

To make it work you need to do the following:

  • install docker-py on the docker host ( if you want ansible to be able to control docker)
  • add the ~/.ssh/id_rsa.pub content to ~/.ssh/authorized_keys file, so you don’t need to store the user password into the ansible inventory file.

Final

An now it should work. Type ‘ah’ and you’ll enter a temporary docker container running ansible. Type ah-playbook and you’ll execute the command ansible-playbook inside a temporary docker container.
Have fun.

%d bloggers like this: