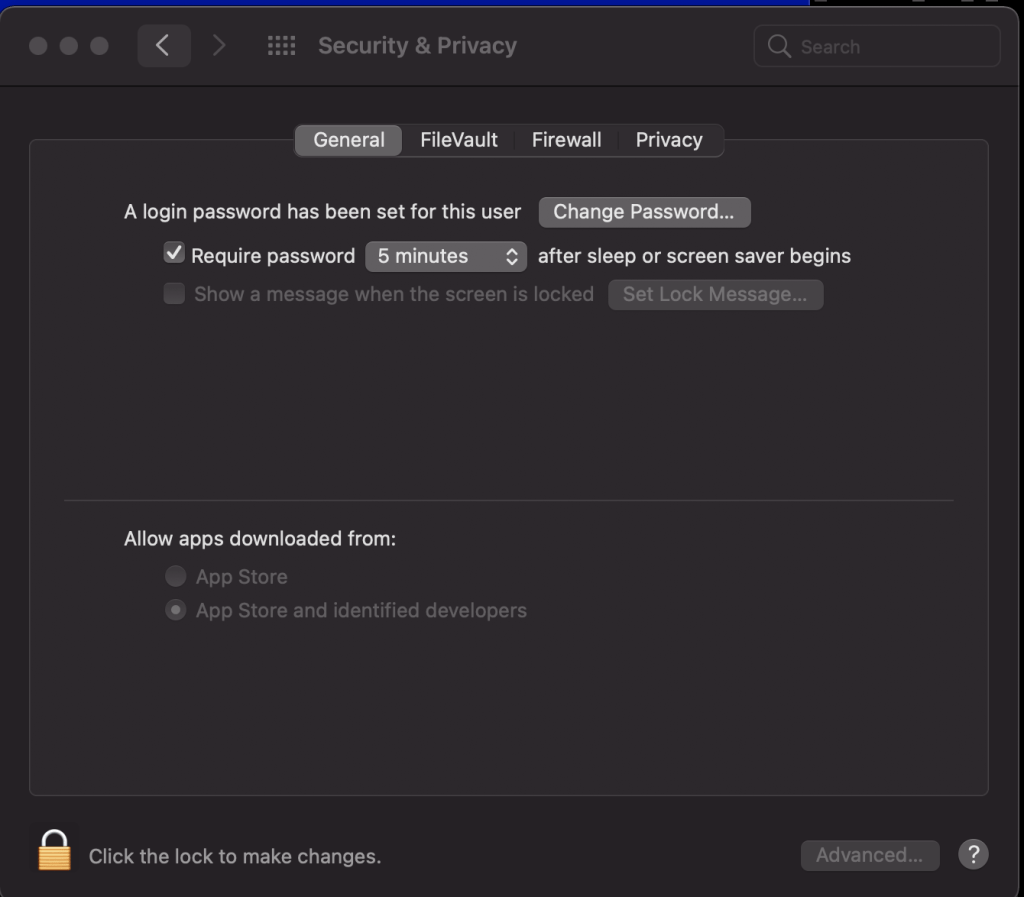
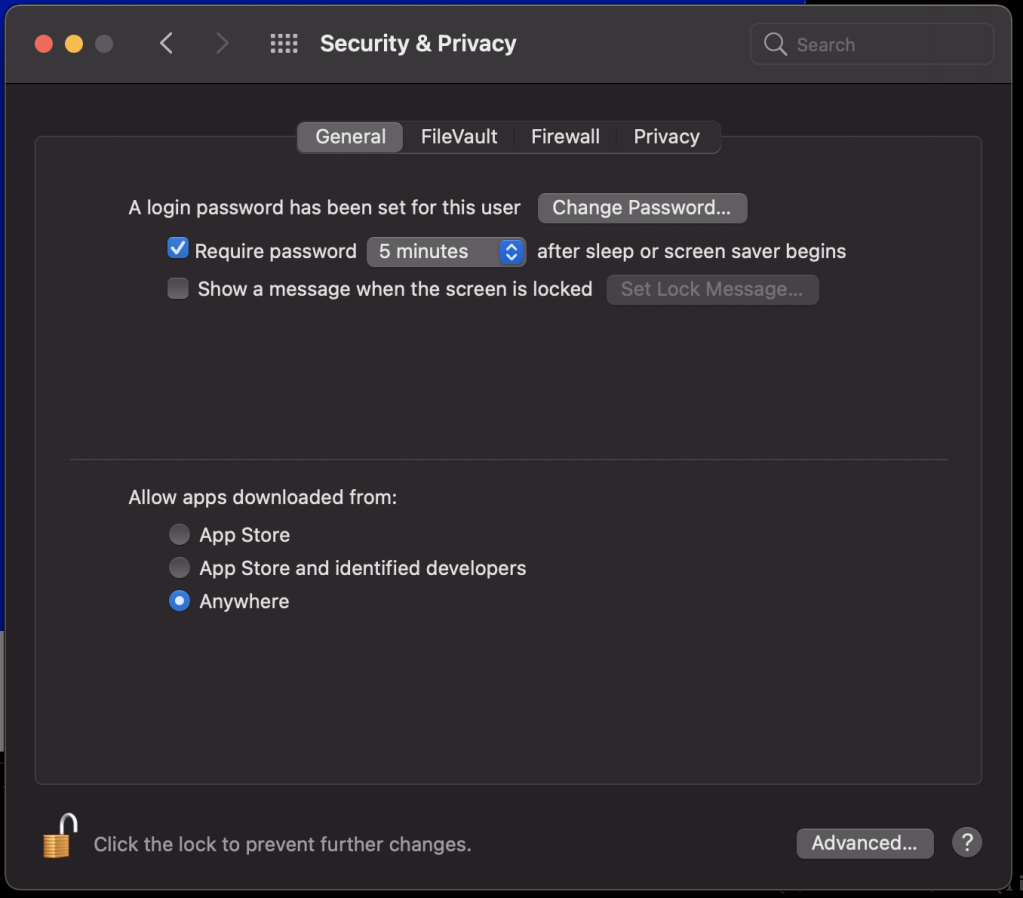
So, Apple is big on security. Which is a good thing. But sometimes, it is too strict. I’m busy remodelling my homelab, and one of the actions is reïnstalling a clean vCenter appliance. And I thought let’s do it from the CLI !!!
Yeah…. so I ran vcsa-deploy and got the error that the app is downloaded from the internet and not to be trusted. So you can allow it via the system preferences, but the MAC OSx gatekeeper keeps irritating you with all the warnings about the libraries that are loaded
Yes, certificate missery. In the wisdom of great corperations, for our safety, it is deiced that the maximum SSL/TLS certificate validity is one year. Yes, really… don’t believe me, just check this search for it ssl lifetime 1 year at DuckDuckGo
From the security side of things this is a good thing. Because it mitigates the risk of a hacked certificate. But from an administration point of view….. HEADACHE. Especially for certificates that are used internally in your production sites. Now you need to replace the certificates every year for your servers. At least for those servers that run web services because your browser is going to nag you that the site isn’t safe anymore. Yes another warning. And you know what happens to warnings, in the end they will think for you, and won’t allow you to access the website anymore.
so SSL certificate monitoring becomes more importent, and having a plan / replacement strategy for SSL certificates would be a good thing to have. Do you have an up-to-date overview of all the SSL certificates in your network ? Maybe a good idea to have it up-to-date and monitor them.
sometimes you just want to clear logs of a docker container. For instance, I’m running dnsmasq in a docker container and I’m troubleshooting raspberry PI PXE boot (yes to run ESXi-ARM stateless…) And the dnsmasq is serving my homelab its domain. Then it can be an annoyance when you run docker logs <container name> seeing all the log entries since the container started. And you just want to start with a clean slate.
It is the way
Yes, there is a way. And when you google you’ll find more blog posts giving you the solution. Which is
And it works great… but… typing 2 lines of code… copy / pasting the log path in the second command.. way too dificult 🙂 So what do you think abou this ?
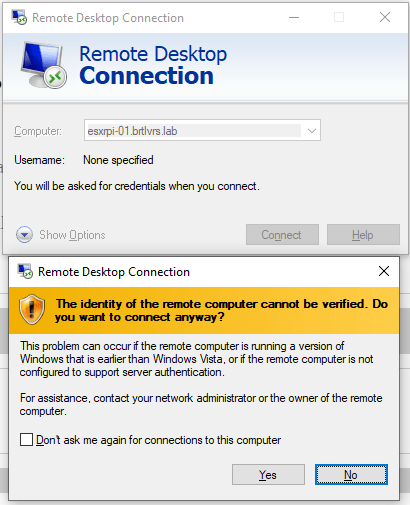
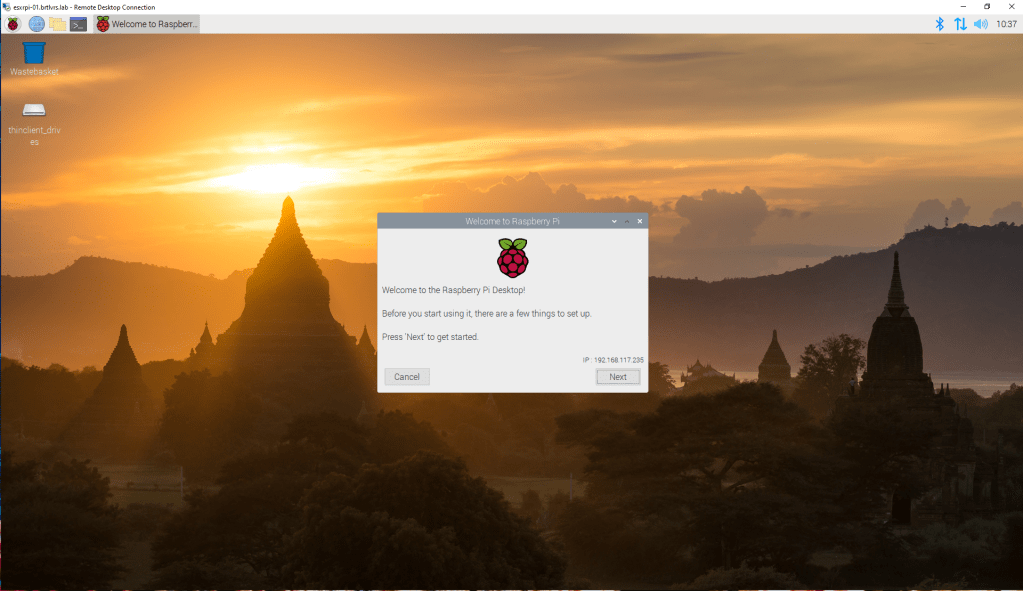
Some of the default installations have a graphic desktop. But, when you use your rPIs headless, what’s the point of these interfaces. Of course you can remove them, but you can also use remote connections. And then you have by default VNC, for which you need to start the service first. But a RDP service, wouldn’t that be usefull, and is it possible ? Yes it is.
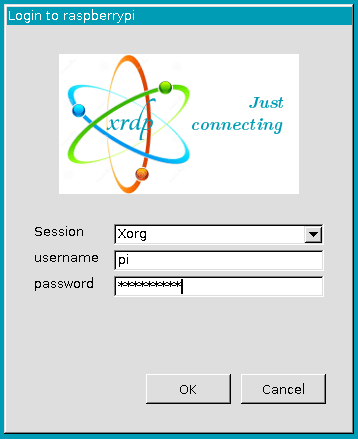
XRDP
It is called xrdp. xrdp is an open-source remote desktop service for linux. And ues, you can run it on a rPI. To find more inf about xrdp check out their site http://xrdp.org/
Install XRDP
To install xrdp on a rpi run the following steps. (assuming you are running raspion OS
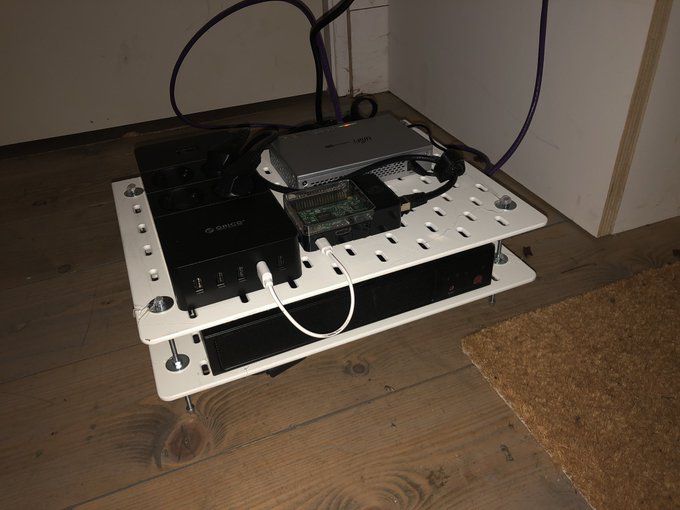
Well, for me it is a stepping stone into my homelab. I have rPI for running dns,tftp,dhcp,samba,http,ntp, unifi controller services in docker containers. With this setup I can control my homelab from this stepping stone. And also acces the IPMI interface of my supermicro server, hosting my vSphere homelab.
I’m using my rPI headless. Meaning no monitor, mouse and keyboard. Just an ethernet connection. And that is great, but then you need to have ssh access.. and by default that is not running. There are some small steps to have ssh running on boot, these are the steps (assumption is that your network has a DHCP service running)
insert SD card into your Windows / MacOS / Linux system
create a file named ‘ssh’ on the root partition.
Insert the SD card into the rPI
boot the rPI
check your DHCP service log for a new created IP lease
SSH to the IP found in the previous step Default username: pi, password: raspberry
A year ago, after following a few sessions at the dutch VMATechcon I decided to dive into the world of Ansible. With a background in industrial automation (programming PLCs) I have a soft spot for writing code. I saw the benefits of declarative languages, and decided to dive into Ansible. But where to start. And what should I use it for.
I’m working on a small VM which provides DHCP,DNS,TFTP,FTP,HTTP and NTP services so I can easily (PXE) boot nested ESXi hosts on VMware workstation and my homelab. All running in docker containers on Photon OS. For maintenance (and learning) I decided to use Ansible for building, running these containers.
One of the issues I had, was that I had to maintain the VM and the software installed on it… I’m quite proficient with Linux, but it can still be a challenge. And keeping installations logs update about how to install software… yeah…. that is an issue. A embraced the solutions docker, git and ansible are giving me. (And vagrant, when using VMware workstation).
Using docker to run the services, using ansible to automate workflows and using git to keep track of changes and store my code in my github repositories. With this approach I can easily rebuild the VM when it breaks down. And I see the VM more as a processing entity, then a virtual computer that needs to be maintained.
The Ansible container
browsing the internet I found this blog post about running ansible inside a docker container and using it interactively on the docker host. This gave me the possibility to have ‘portable’ ansible installation, without any ties to the VM OS. In my opinion it is great. With adding some small bash scripts so I don’t need to write something like ‘docker run -rm -it …..’ everytime, I have an ideal solution. The original code for the container is based on alpine:3.7 and python 2. Everytime I build the docker image I received a warning that python 2 is outdated…. so I (finaly) updated the dockerfile using alpine:3.11 as the base image and using python 3. You can find my code here on github, and the docker image here on dockerhub.
How to use
simple. There are 2 ways to use it.
clone git repository
pull image from dockerhub
Option 1, clone git repository
I’ve created a small installation script to make things easier. It will run docker build to build the ansible image and it will copy the scripts under ./scripts/ to /usr/local/bin/ And your all set… well almost
Option 2, pull image from dockerhub
Instead of building the image, you can pull it from dockerhub into your local docker environment. The scripts assume that the docker image is tagged like ansible:2.9.0, but when you pull it from dockerhub, the name is brtlvrs/ansible-helper:v.0.3. So you need to retag them (or edit the scripts).
docker image tag brtlvrs/ansible-helper:v.0.3 ansible:2.9.0
docker image tag ansible:2.9.0 ansible:latest
The wrapper scripts are stored in the image, in the folder /2installOnHost To copy them out of the image do the following
docker create -n test ansible:2.9.0
docker cp test:/2InstallOnHost/ah* /usr/local/bin/
chmod +x /usr/local/bin/ah*
docker rm test
This will create a docker container named test, using the imported image ansible:2.9.0. Then copies the files from inside the container to the /usr/local/bin/ and sets the executable bit on these files. Finally it removes the created docker container. Now you should be able to run ah or ah-playbook.
Both scripts will mount the folowing volumes into the container
local
mountpoint
remark
~/.ssh/id_rsa
/root/.ssh/id_rsa
needed to access localhost via ssh (ansible)
~/.ssh/id_rsa.pub
/root/.ssh/id_rsa.pub
needed to access localhost via ssh (ansible)
$(pwd)
/ansible/playbooks
Mountpoint is the default location inside the container.
/var/log/ansible/ansible.log
Making the ansible logs persistent.
Finishing touch
To make it work you need to do the following:
install docker-py on the docker host ( if you want ansible to be able to control docker)
add the ~/.ssh/id_rsa.pub content to ~/.ssh/authorized_keys file, so you don’t need to store the user password into the ansible inventory file.
Final
An now it should work. Type ‘ah’ and you’ll enter a temporary docker container running ansible. Type ah-playbook and you’ll execute the command ansible-playbook inside a temporary docker container. Have fun.
Recently I discovered you can change the default ESXi DCUI screen. This feature is already present for a long time…. just check one of my favorite blog sites (virtualGhetto) for this item here. Yes he blogged about it in 2010….. I know
Why would you want to change it
Your Company wants a warning shown on the DCUI
Security, don’t show hostname, ip etc…
showing off ASCI-ART – just for fun
….
For me, it was point 3…. I run on my laptop VMware Workstation and am sometimes in need of spinning up nested ESXi with different kind of versions. For this reason I build a provisioning VM, so I can network boot empty VMs and choose from an iPXE menu the ESXi version I want to work with. (maybe some interesting stuff for a blog serie) And this setup wasn’t finished with a custom DCUI screen.
How does it work
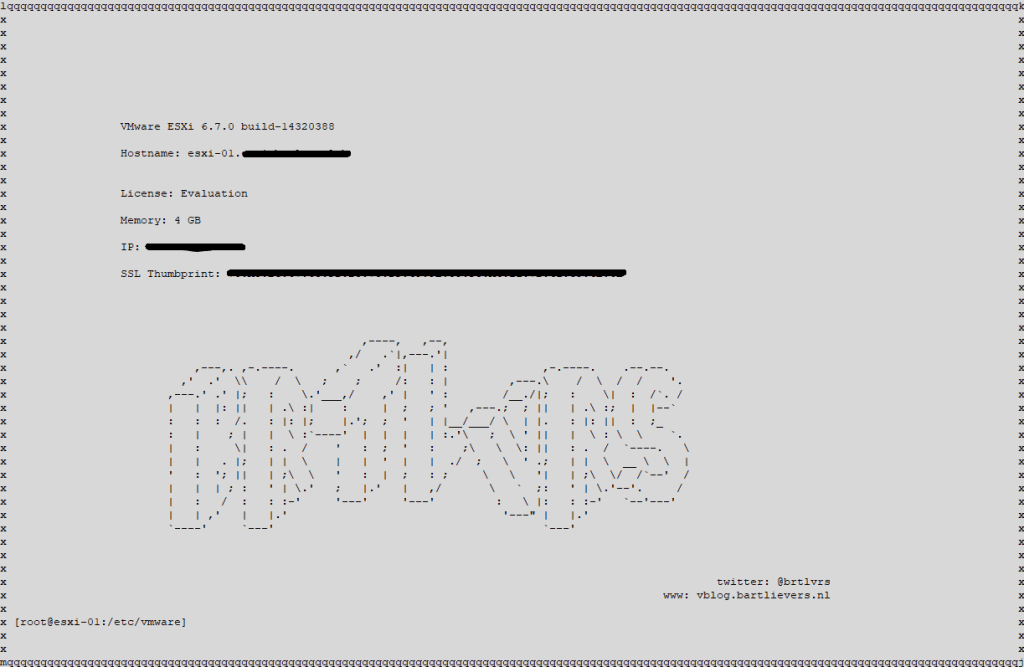
Until version ESXi 7.0 there is a text file /etc/vmware/welcome, which you can edit. When it is succesfully edited, the DCUI wil show the result. My screen shows: VMware product and version, license, Memory, IP, SSL Thumbprint and ASCI-ART 🙂
You can also edit the logonbanner, shown when you access the host via SSH. And the support info
Until ESXi 7 ?
Yes, until… well almost. Until version 7.x you just could simply edit the file /etc/vmware/welcome. But it isn’t there anymore. But there is a different way. Called CLI. You can edit the welcome message with esxcli and powercli. Information is found in the VMware knowledge base kb2046347. And this works for a lot off ESXi versions. I’ve tested it succesfully from 5.5 to 7.0.
ASCII-ART
Well, you can show your creative side. Some guidelines I found are:
Especially number 3 is a killer. A lot of text editors will replace a certain amount of spaces with a TAB character… and this will mess up your screen.
ESXCLI method
The syntax is easy, just
esxcli system welcomemsg set -m 'your welcome'
And that is what is shown in the kb article. But how do you create a complete screen. Well, there are some undocumented parameters you can use. The article by William Lam (see above) shows some of them. But I haven’t find a site with all of them. With those parameters you create in a text editor your screen…. like this one
Every line that uses a different background color then black is 125 characters long, not including the length of any fields that are used, like {color:white}.
After you created your file, you can place it in /etc/vmware or use esxcli to edit the welcome message. If the file is placed in /tmp/welcome.txt then your instruction is like
esxcli system welcomemsg set -m "$(cat /tmp/welcome.txt)"
And voila, you have a custom welcome screen.
DCUI with SSH
The DCUI is not only shown on the console screen of ESXi, but also accessed via SSH by >dcui The result is shown below.
For a customer I’m migrating their legacy vSphere 5.5 environment to vSphere 6.5 U3. The migration is from a windows vCenter to the VCSA. First, we tried to use the GUI and stumbled over an issue.
GUI
The GUI, is of course a nice, friendly way to do this process. But when we got at the stage to select the size of the VCSA, we only had the ‘xlarge’ option. And well… that was a bit too much. Because we were aiming at the ‘small’ size.
So we did some searching on the internet and found out that we were not alone. Although it was an encouraging thought, we still didn’t find what we were looking for. Most of the threads and blog posts pointed to database size, log size etc.. And yes, they need to be checked. We had a vcenter database table of 7 million records, the size of the database was 80 GB. After some cleaning up and shrinking the database it was only a few GB. But al this effort, didn’t persuade the GUI to give us the desired ‘small’ size option.
CLI
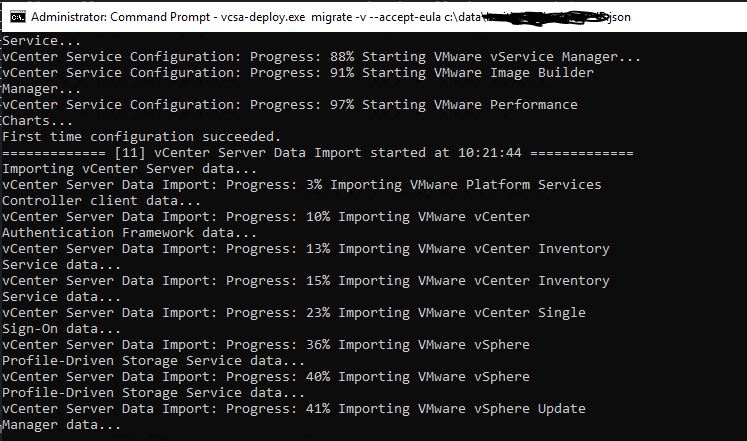
Hoping that the validation in the GUI was different than when using the CLI, we decided to migrate using the vcsa-deploy CLI method.
Yes, it involves creating a json file. But the .iso file for the vcsa contains several template files, for several migration scenarios. We used on of the templates, customized it to our needs (setting the size to ‘small’. And after some trial and error we finally got it working.
If you want to read more about the CLI way of migration, check the vmware docs here.
vcsa-deploy creates for every run a new log folder . When we checked the logs we found out that vcsa-deploy was content with the ‘small’ size option we configured in the json file.
Thoughts
Why not 6.7 U3, well due to dependencies 6.5 U3 is at the moment the most current version we can run. Although this post is about migrating to 6.5 U3, it could also work for 6.7 U3, but no guarantees. The gist of this all is, if the GUI doesn’t work, try doing it the CLI way.
I know, it is not the most interesting subject to blog about. VMware gives you the opportunity for your My VMware account to use MFA. And I would advise to use MFA.
Why ?
Well, depending on the situation, your my vmworld account can have access to different company accounts. Giving you, depending on roles and permissions, the ability to create support requests, download software, access licenses etc… And that is great. But it is a risk when your account gets hacked. That is where MFA can help. It is an extra line of defense.
MFA
MFA stands for, multi factor authentication. And when MFA is enabled,a person needs to present multiple pieces of evidence to authenticate (see https://en.wikipedia.org/wiki/Multi-factor_authentication ) Most of the times these pieces are a password and a token, generated by a authentication app or device. So, when you would know my password, you still can’t use my ‘my vmware’ account because I’ve enabled MFA. And the token is generated on my phone, which I have with me, and is locked.
My advise
Use a strong password. Strong doesn’t mean a lot off difficult characters, although there are some rules you have to follow. Study has shown that also the length of your password is a big key in having a strong password.
Enable MFA. Check this VMware KB on how to enable MFA for your My VMware account.